Content creation is one of the most important element you’ll have to consider in your strategy. From devising the strategy to measuring the success of your content. The time commitment is what we’ll be covering in this article.
According to a report by the Content Marketing Institute, 77% of B2C marketers will be producing even more content. More content means we need to start thinking how to improve our writing schedule and optimizing the way we work. A content writing schedule is a process you need to develop if you want to keep up with your competitors. It should help you write consistently and effectively, in conjunction with your content calendar.
Here is the step-by-step guide on how to create and manage a writing schedule.
Step 1: Research
Research is the first step of any writing process. Researching phase is a good time to brainstorm, write ideas as they come to you and compile a list of keywords you want to target in your content. Sometimes you might start your research with an idea.
For example, “I want to write an eBook about polar bears,” in which case you’ll have to research what people want to know about polar bears. Furthermore, what’s currently written about them on the web? Do you have something new to offer? Can you write about polar bears from a new angle?
 Start research with brainstorming for ideas
Within this step, you’ll need to determine what will make a good blog post vs. what will make a good eBook. If you find that you have a lot of information that is not out there on the web, an eBook might be the best way to go.
What to consider:
- What keywords or topics will you be working with?
- Who are you writing for?
- What are you writing about?
- How much detail will you go into?
- What does your audience want to know?
- What is already out there?
- How can you make yourself stand out?
Take set amount of time for research. Then focus! Research can often lead to aimless surfing. Try to answer the questions above in a set amount of time to achieve maximum efficiency.
Step 2: Organize Your Research
Once you have a large list of topic ideas, categorize them into themes. Some examples of themes are news, humor, lifestyle, technology, and careers. You can organize your research into a spreadsheet, and I find this works best. Have a column for topic idea/working title, a column for the goal of the content, how many words, and whether it will be a large content piece that can be made into smaller blog posts later. There are plenty of templates available online that you can use as a guide to help you organize your content.
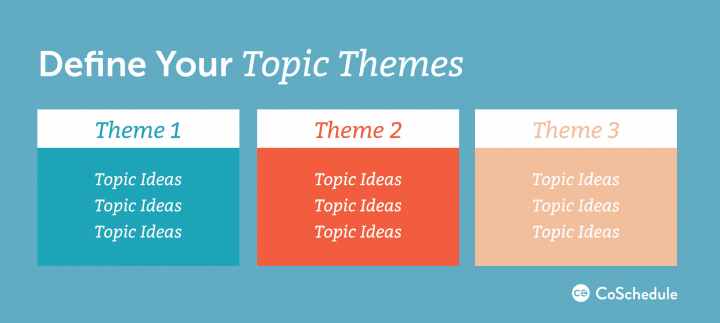 It's good to categorise your topics into themes
What to consider:
- Does all the content align with your strategy?
- Does each piece of content have a clear and defined audience and purpose?
Another way to categorize your content is to use mindmaps. Sometimes mindmaps give you a clearer overview of the topic at hand.
Step 3: Begin Your First Draft
A draft is an important step in the writing process. A first draft can begin with a list of bullet points or working sub-headings that will address what you aim to cover in the piece. This step will allow you to think about the content in a more practical way than the research phase. Because now you’re thinking about the value you’re providing. As you flesh out your first draft, don’t just think about the points you’re making, but also how you address them and how much detail you will go into.
What to consider:
- What message do you want to convey?
- What are the key points?
- What value do you want to provide that your competitors don’t?
When you have a list of themes or a mindmap then writing the first draft is a breeze. Write down the sub-headings and add the most important points you want to make to each.
After that go over your writing and start to elaborate each of the main points. Add examples and jokes. Use data and statistics to prove your point. Refine your writing until you have exhausted your research. Then write the intro and conclusion.
Step 4: Have a Break
The creative process can often be draining, and once you have completed your first draft, it’s a good idea to let it sit for a while before you go in and edit it. A short half an hour break can reset your brain and keep you productive in the longer term.
During the break, your brain works in the background, and when you come back to your content, then you can have insights that you might have missed otherwise.
Step 5: Start Your Second Draft
I recommend this step only for larger content pieces. Usually, blog posts between 500-1500 words don’t need a second draft because the first can be fleshed out and edited. But if you’re working on a large piece of content, a second draft will really improve on what you’ve already written.
What to consider:
- What can I salvage from my first draft?
- Don’t be afraid to cut out chunks of information and replace with new information
- Are there any new sources or experts I can use that will strengthen the piece?
- Is it too technical or not technical enough?
One of the best pieces of advice about writing is to set your content aside and return to it after 24 hours. You will make your content better. Every time! But don’t let the break exceed two days. Then you start to forget the topic, and you’ll waste time getting back on track.
Step 6: Get to Editing
Editing requires great attention to detail and the ability to omit irrelevant information. You might be quite attached to your ideas, but if they don’t quite fit in the content piece you’re working on, consider using them for something else. The editing process can take anywhere from an hour to several hours depending on how lengthy it is. A 40-page eBook is likely going to take a while to review, and you will need several sets of eyes to look at it.
What to consider:
- Is this piece of content the right length for its purpose?
- Is it proportioned correctly; is the introduction short and to the point, or too lengthy to be effective?
- Can anything be omitted that doesn’t quite fit?
- Does it have a consistent tone?
- Does it align with the brand?
- Are the paragraphs too long; can I break them up more?
If a word can go, it must go. Eliminating clutter is a rule that makes your writing more concise and easier to read. Cut everything that doesn’t help the reader to understand your point.
Step 7: Structuring the Piece
When you’re writing for the web, it’s a good idea to have a clear beginning, middle, and end. As a general rule, the introduction should make the reader want to continue. The middle should be spaced out with plenty of paragraphs and points. The end should either effectively summarize the article or offer a call to action. The structure depends on what the content piece is. An eDM, for example, isn’t going to need a lengthy conclusion, but rather a short and snappy call to action.
In this step, you also want to consider your title. At this stage, you probably have a few ideas for a working title. But now that you have all your content laid out in front of you, it should be easier to come up with something punchy and creative.
What to consider:
- Do my points flow easily to the next?
- Does my title entice people to read the piece?
- When I read the entire article, does it make sense chronologically?
- Am I being too vague in my writing?
- What images to use for illustrating the points I’m making?
You have done most of this work in the draft and edit phases of writing your content. Now you make it shine with a catchy title and rewiting sub-headings in a way that they draw our reader into the paragraph that follows.
Add visuals! Examples, graphs, flowcharts, videos, tables. Anything that visually helps to make your point clearer. Break up the wall of text with visual material.
Step 8: Final Overview
The final overview allows you to do any touch ups and small fixes; it is the final stage of the editing process. Read the content aloud to yourself or to someone else to hear how it flows.
What to consider:
- Are the sentences well structured?
- Does the finished work seem polished?
- Is it free of any typing or grammatical errors?
The best option is to let a professional proofreader take a look at your writing. If that’s not possible use all the tools that help you fix and improve your content. Spellchecker or Grammarly are your friends. Hemingway App makes your writing simpler so you might want to use that already in the editing step.
How to Stay on Writing Schedule
Keeping a schedule is the best way to have an efficient process, but when you get started, it can be hard to stay on track. Here are a few tips to help keep you on your writing schedule.
1. Don’t Get Discouraged
You might find yourself going back and forth between steps, and this is normal. Particularly if you’re working on a large content piece. It’s up to you how much time you allocate to each of the above steps. You might be a whiz at editing, but research could be a painstaking process in which case you’re going to spend longer doing it.
2. Utilize Productivity Apps
Set up a timer if you work better that way, or aim for a certain number of words if a word count goal motivates you. There are many productivity apps out there that might be useful. I use Toggl for several reasons; you can use it both online and offline. You can use it on the web, but it has apps for desktop, iOS, and Android that will sync together in real time. Take a look at this in-depth Toggle review.
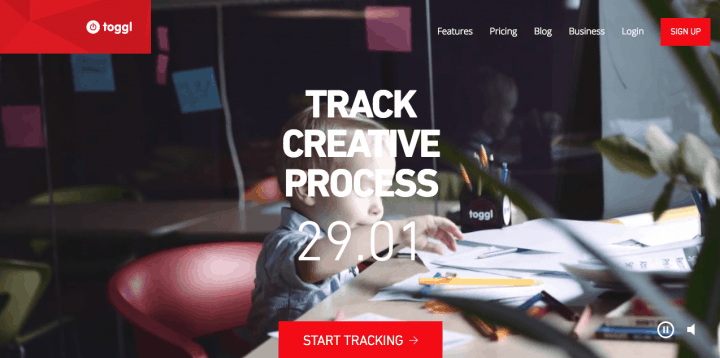 Toggl is an app for tracking the time you spend on doing something
3. Look Through Old Content
If you have useful documents or white papers that are sitting unopened in your file folder, consider re-purposing it and re-writing it for an online audience. Sometimes the best content is right under your nose, and you don’t have to spend a long time searching for ideas. Likewise, if you have a blog that is several years old, look through your archives for old content that you can update with new information.
4. Use a Daily Planner or Calendar
Putting everything on the calendar is one of the best ways to stay organized because it creates a timeline for you to work with. You can quickly become overwhelmed if you don’t organize your time well.
5. Read as Much as You Can
As a writer, it’s very important to read every day. Read a variety of things, from books related to your industry, to blog articles and even novels. When you read, you boost your creative output which helps in each of the steps we’ve covered. It’s also a great way to expand your vocabulary and approach topics from a different angle.
How do you manage your content writing schedules? Do you have any useful tips for staying on track? Let us know in the comments!
__________________________
Photo Credit: Visual Hunt